Buying Your First Cutting Machine, Chapter 1: Silhouette
We started Hawaiian Air Depot to eliminate the most difficult barrier to modelers who are interested in creating their own masks and parts: designing them in vector drawing programs like Illustrator, Corel Draw, and Inkscape. Our idea is if you already have an HAD file to cut, buying a machine and playing around with it shouldn’t be any more difficult than buying your first airbrush and compressor. So we’d like to help you select your first craft cutter.
Here are our current recommendations for getting started with Silhouette machines. We’ve actually used these and evaluate them from a scale modelers point of view. We’re providing Amazon Associate links; if you find something you like you can purchase through our link and we’ll make a modest commission, which we hope allows us to quit our day jobs and design model stuff for you all the time.
But we also encourage you to support your local arts and crafts stores if you have one nearby. Help out your community while you are having some fun.
Here we go:
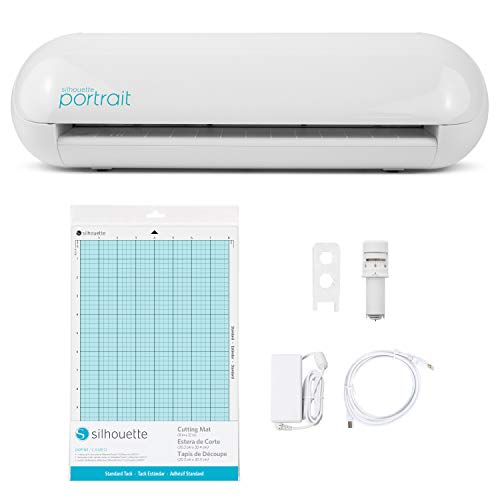
Silhouette Portrait 3: We’ll start it up by recommending what we think is currently the best, most affordable machine to get you started: the Silhouette Portrait 3. It has a great combination of affordability and capability for basic scale modeling. To elaborate, let’s start with some criteria.
Cutting Bed Size: First thing to consider when choosing a cutter is the size of the cutting bed: how big a sheet of material the machine can cut. For the Portrait 3, the bed allows a cutting space of 8 inches wide. Since cutting machines all have roller feeds, in theory you can cut a much longer length, up to 10 feet according to Silhouette.
We’ve found that an 8-inch bed is more than enough width for everything we’ve yet designed, up to our largest so far: camouflage masks for the 1/24 Airfix Spitfire IX. Most of the media we’re testing now— including Tamiya Masking Sheets— fit the 8-inch bed without modification.
Vinyl materials are typically sold in 12 in wide rolls. We cut 8-inch sections pretty easily— and economically— to make our own 8x12 sheets for the larger stuff. And so far we’ve designed our Styrene Sheet Metal sets to fit 4 x 6” sheets, which is a third of the standard Evergreen sheet size.
So we’re designing with the 8-inch bed in mind, and as of yet we haven’t found it to be a limitation for anything we plan to offer. And keep in mind we’re planning to offer stuff for the 1/18 Merit Dauntless (because the bigger the Dauntless, the better.).
Capability: Next things to consider are a variety of capabilities: how fast does the machine cut? How thick a material can it cut? How dense? How fine a cut can it manage? What variety of tools and blades can you use?
We think the most two important tech specs for scale modelers are Maximum Media Thickness: (2 mm, or 78.8 mils for the Portrait 3) and Maximum Cutting Force (210 gf). These are perfectly adequate for most scale modeling tasks. Here’s a link to complete Portrait 3 tech specs.
Your needs for these will vary based on how you expect to use your machine. If you are planning mostly to cut your own painting masks, The Portrait 3 will do as good a job as any machine we’ve tried. For instance, we’ve cut the same file on the Portrait 3 and on the Cricut Maker 3— in our view, currently the Cadillac of home cutting machines (more on that later)— and we can’t tell the difference between the masks.
If you’re a fan of our Styrene Sheet Metal sets, so far we’ve made designs that require cuts in .005, .010, and .015 styrene and again, the Portrait 3 has no problem with these tasks.
If you’re a serious scratch builder scheming to eventually cut all sorts of materials for your mad-scientist models? Well, this could be the only reason to initially consider something more than the Portrait 3. We’re scheming, too. We plan to offer designs in thicker styrene, craft foam, balsa wood, and whatever else we dare run through our machines. We’ll report back on how well the Portrait 3 handles whatever we throw at it.
So if you want to start slow and don’t want to break the bank (you can aways upgrade later) then we recommend the Portrait 3. Oh, and one more thing: at first, we only bought one because we started visiting model shows and clubs to offer demonstrations and tutorials, and right away we got tired of flying around bigger, heavier, more expensive equipment. The Portrait 3 is roughly half the size and weight than anything else out there. We hoped it would be just good enough for what wee needed to do for demos, and it turns out it is well more than just good enough. We’re pretty impressed.

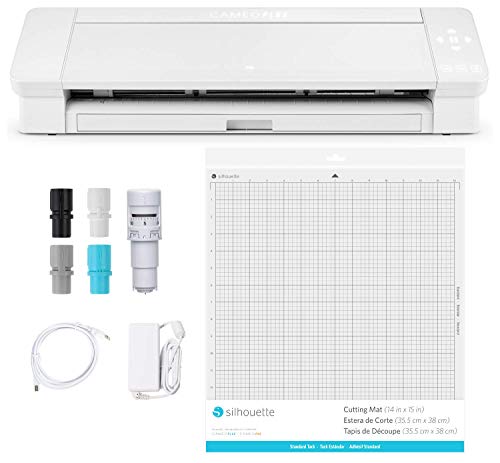
Silhouette Cameo 4: Silhouette’s upgraded machine is the Cameo 4, and it offers three clear advantages to the Portrait 3: a 12-inch cutting bed, dual tool carriages, and a second carriage that will also cut media up to the 3mm, a bit more than the Portrait.
The 12-inch cutting bed offers more versatility for larger projects, and some convenience for the variety of 12-inch roll material out there. If you imagine bigger projects— including some beyond the scale modeling purview, then the 12- inch bed might be useful. But as we noted in our discussion about the Portrait 3, most scale modeling projects won’t strictly require it.
Having dual carriages means you can load two different tools— two blades, a blade and a pen, etc.— and deploy them during the same cut. It’s a fancy little feature that we find appealing. We’re developing a few product lines in that could employ dual carriages in a rather elegant fashion.
But it isn’t indispensable for anything we’ve yet imagined. Single carriage cutters like the Portrait 3 should be just as capable, requiring you simply divide your project into multiple tasks and switch tools in between. The main issue for this is registration: does the machine feed the second cut in precise alignment with the first?
We’ve tested this on all our Silhouette machines as we developed out Styrene Sheet Metal products. They include lines that are meant to be cut and others that are meant to be scribed: panel lines and rivets, and for our P-51 tailwheel door parts, a pretty sweet little piano hinge. Turns out the Silhouette scribes it remarkably well.
In each case we tested it using a single carriage, scribing first, then inputting a new task for cutting. We weren’t certain the machine would load the second cut in precise alignment with the first. Well, it does. Really well. Just don’t physically remove and reload the cutting mat between tasks and any Silhouette machine is quite able to make these finely rendered parts.
The third advantage is cutting force: while the main carriage features the same cutting for of the Portrait 3 (210 gf), the second carriage will cut at 5 kgs, which should accommodate some serious scratch building. Complete tech specs for the Cameo 4 here.

Cameo Plus and Pro: Okay, we fibbed a little (don’t tell my mom): we haven’t personally tested the Cameo 4 Plus and Pro, but far as we can tell, they offer the same features of the Cameo 4 with upgraded cutting bed sizes and a higher cutting force on Carriage 2. As noted before, if you need bigger, stronger, and more badass for other hobbies, look at these options. But we can’t now imagine needing such specs for most scale modeling applications. We don’t need to buy one yet, but you never know…
Conclusion: Silhouette offers great machines for scale modeling applications. Want to get started? Get yourself a Portrait 3, teach yourself to Make Your Own, and turn out a few sweet models in no time at all. As you learn the skills, consider upgrading to the a Cameo 4 as necessary. For many of you, it may never be.
In our next blog, we’ll lay it out for Cricut machines, but we’ll get you a quick preview here: Cricut makes a superior machine, but they are more expensive and we like the Silhouette software interface better. The software allows you to set up your cuts and to modify our designs, and to ultimately design on your own. That’s a big deal to us: we’ll post a further blog about how each software interface works for trying to Make Your Own, especially if you don’t have much experience with vector drawing programs. We also hope to provide advanced tutorials down the road.
Until then, get yourself a Portrait 3 or Cameo 4 and Make Your Own Hawaiian Air Depot designs. And when you do, please share with us your experiences and questions in the comments section below, or via our Contact page.