How we design HAD products
For modelers cutting their own masks, the process often starts with scanning decals from the kit and tracing them into the design software included with Silhouette and Cricut machines.
A good start, but one with drawbacks. While some kit and aftermarket sources are quite good, others not so much. And while the cutting software isn’t too hard to learn, none offer as powerful and versatile a toolkit as Adobe Creative Suite and other pro platforms.
We’d like to show you how we use Creative Suite to make sure our interpretations of markings are among the best available.
Our design philosophy is straightforward. We work from actual kit parts to establish the positions and proportions of markings, and we prioritize published dimensions and period photographs to determine just what insignia and markings looked like.
Here’s a familiar example; we’re releasing a set to convert and paint the gorgeous 1/24 Airfix F6F-5 Hellcat to depict David McCampbell’s Minsi II and Minsi III. Rather than relying on existing decals and drawings (we looked, and they are all rather different. Hmmm…) we uploaded photos of McCampbell in the cockpit of Minsi III and got to work making our own.

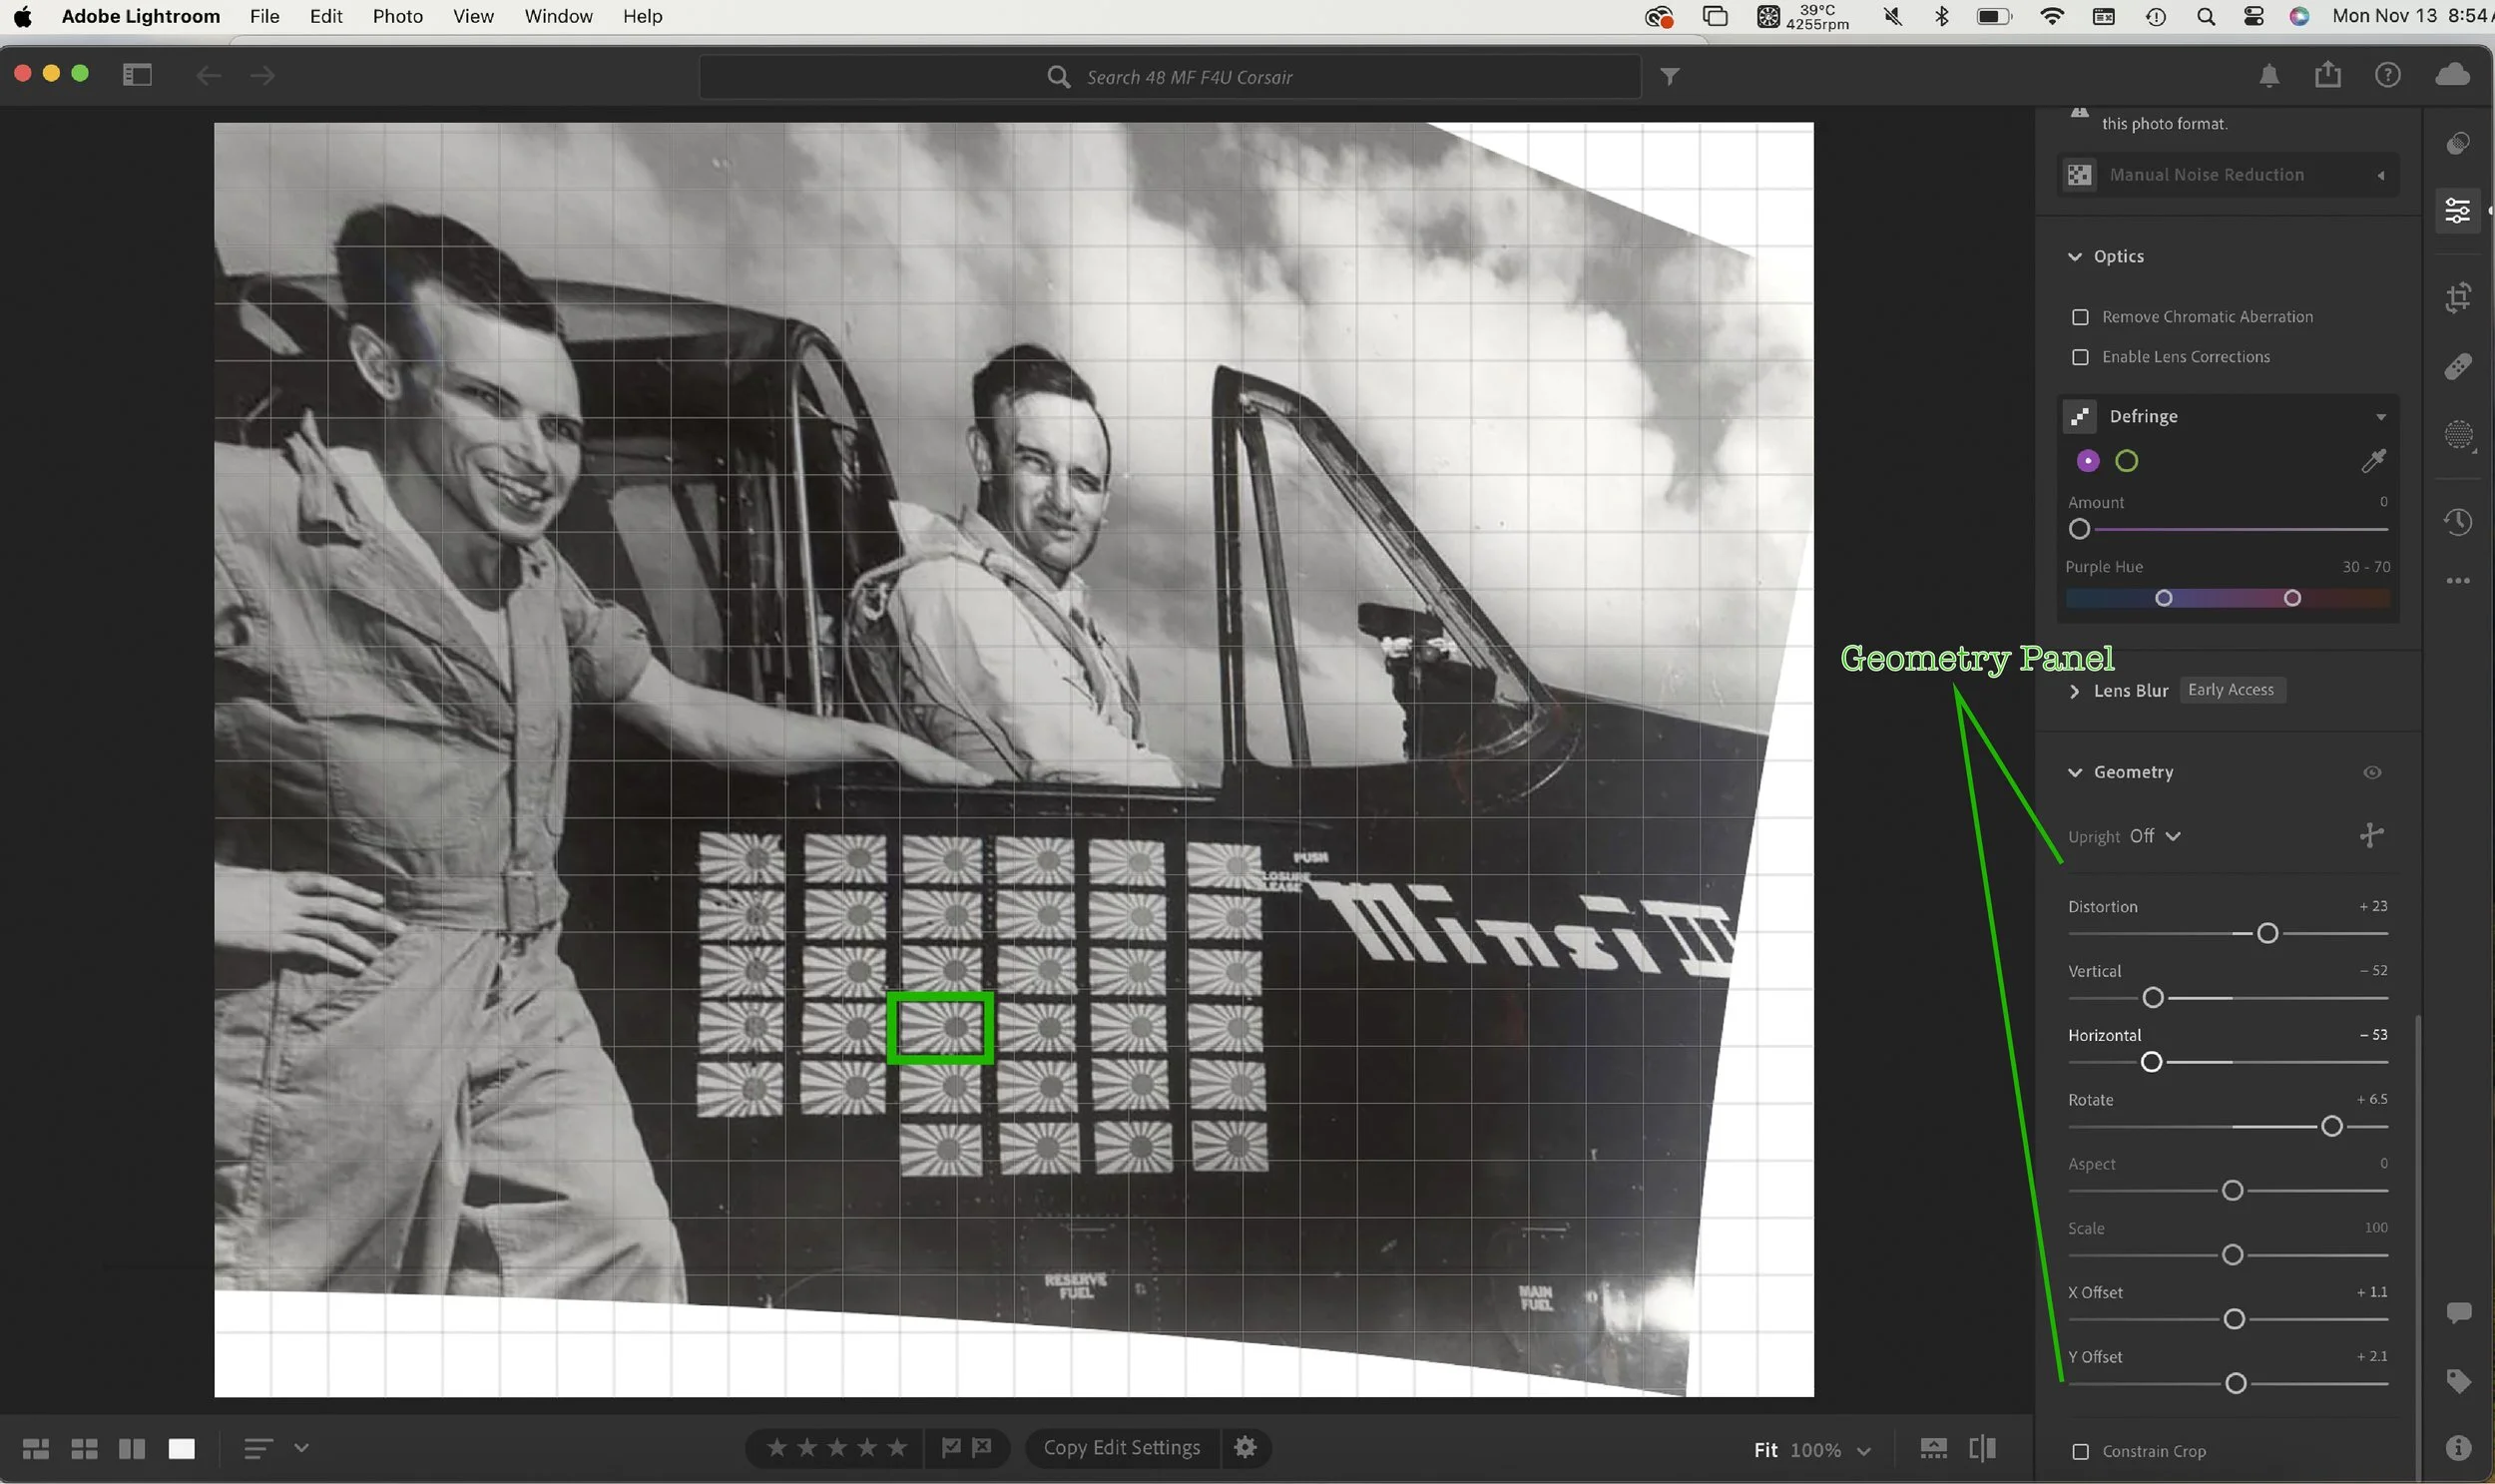
Period photos are a good start, but most such images are made at different camera positions and angles, and with different lenses. These create distortions, making the space between shapes and the angles of lines easily misinterpreted.
Adobe Lightroom to the rescue. Lightroom has geometry controls to adjust various distortions in a photo. Using them, we’ve devised a process to give us a peek at what Minsi III and other markings probably looked like when viewed from straight on.
What we do is identify a nearby feature whose shapes and proportions are known. Minsi III has a good option: the victory flags. We know they are rectangles and it’s a good bet they are the standard 3 to 2 proportion of most flags.
With that in mind, we noodle around with the various geometry sliders until a chosen flag (near the center, and close to the center of the camera lens) appears an undistorted rectangle at a 3 to 2 ratio. Now our photo is a more reliable guide to the spacing and layout of the flags.
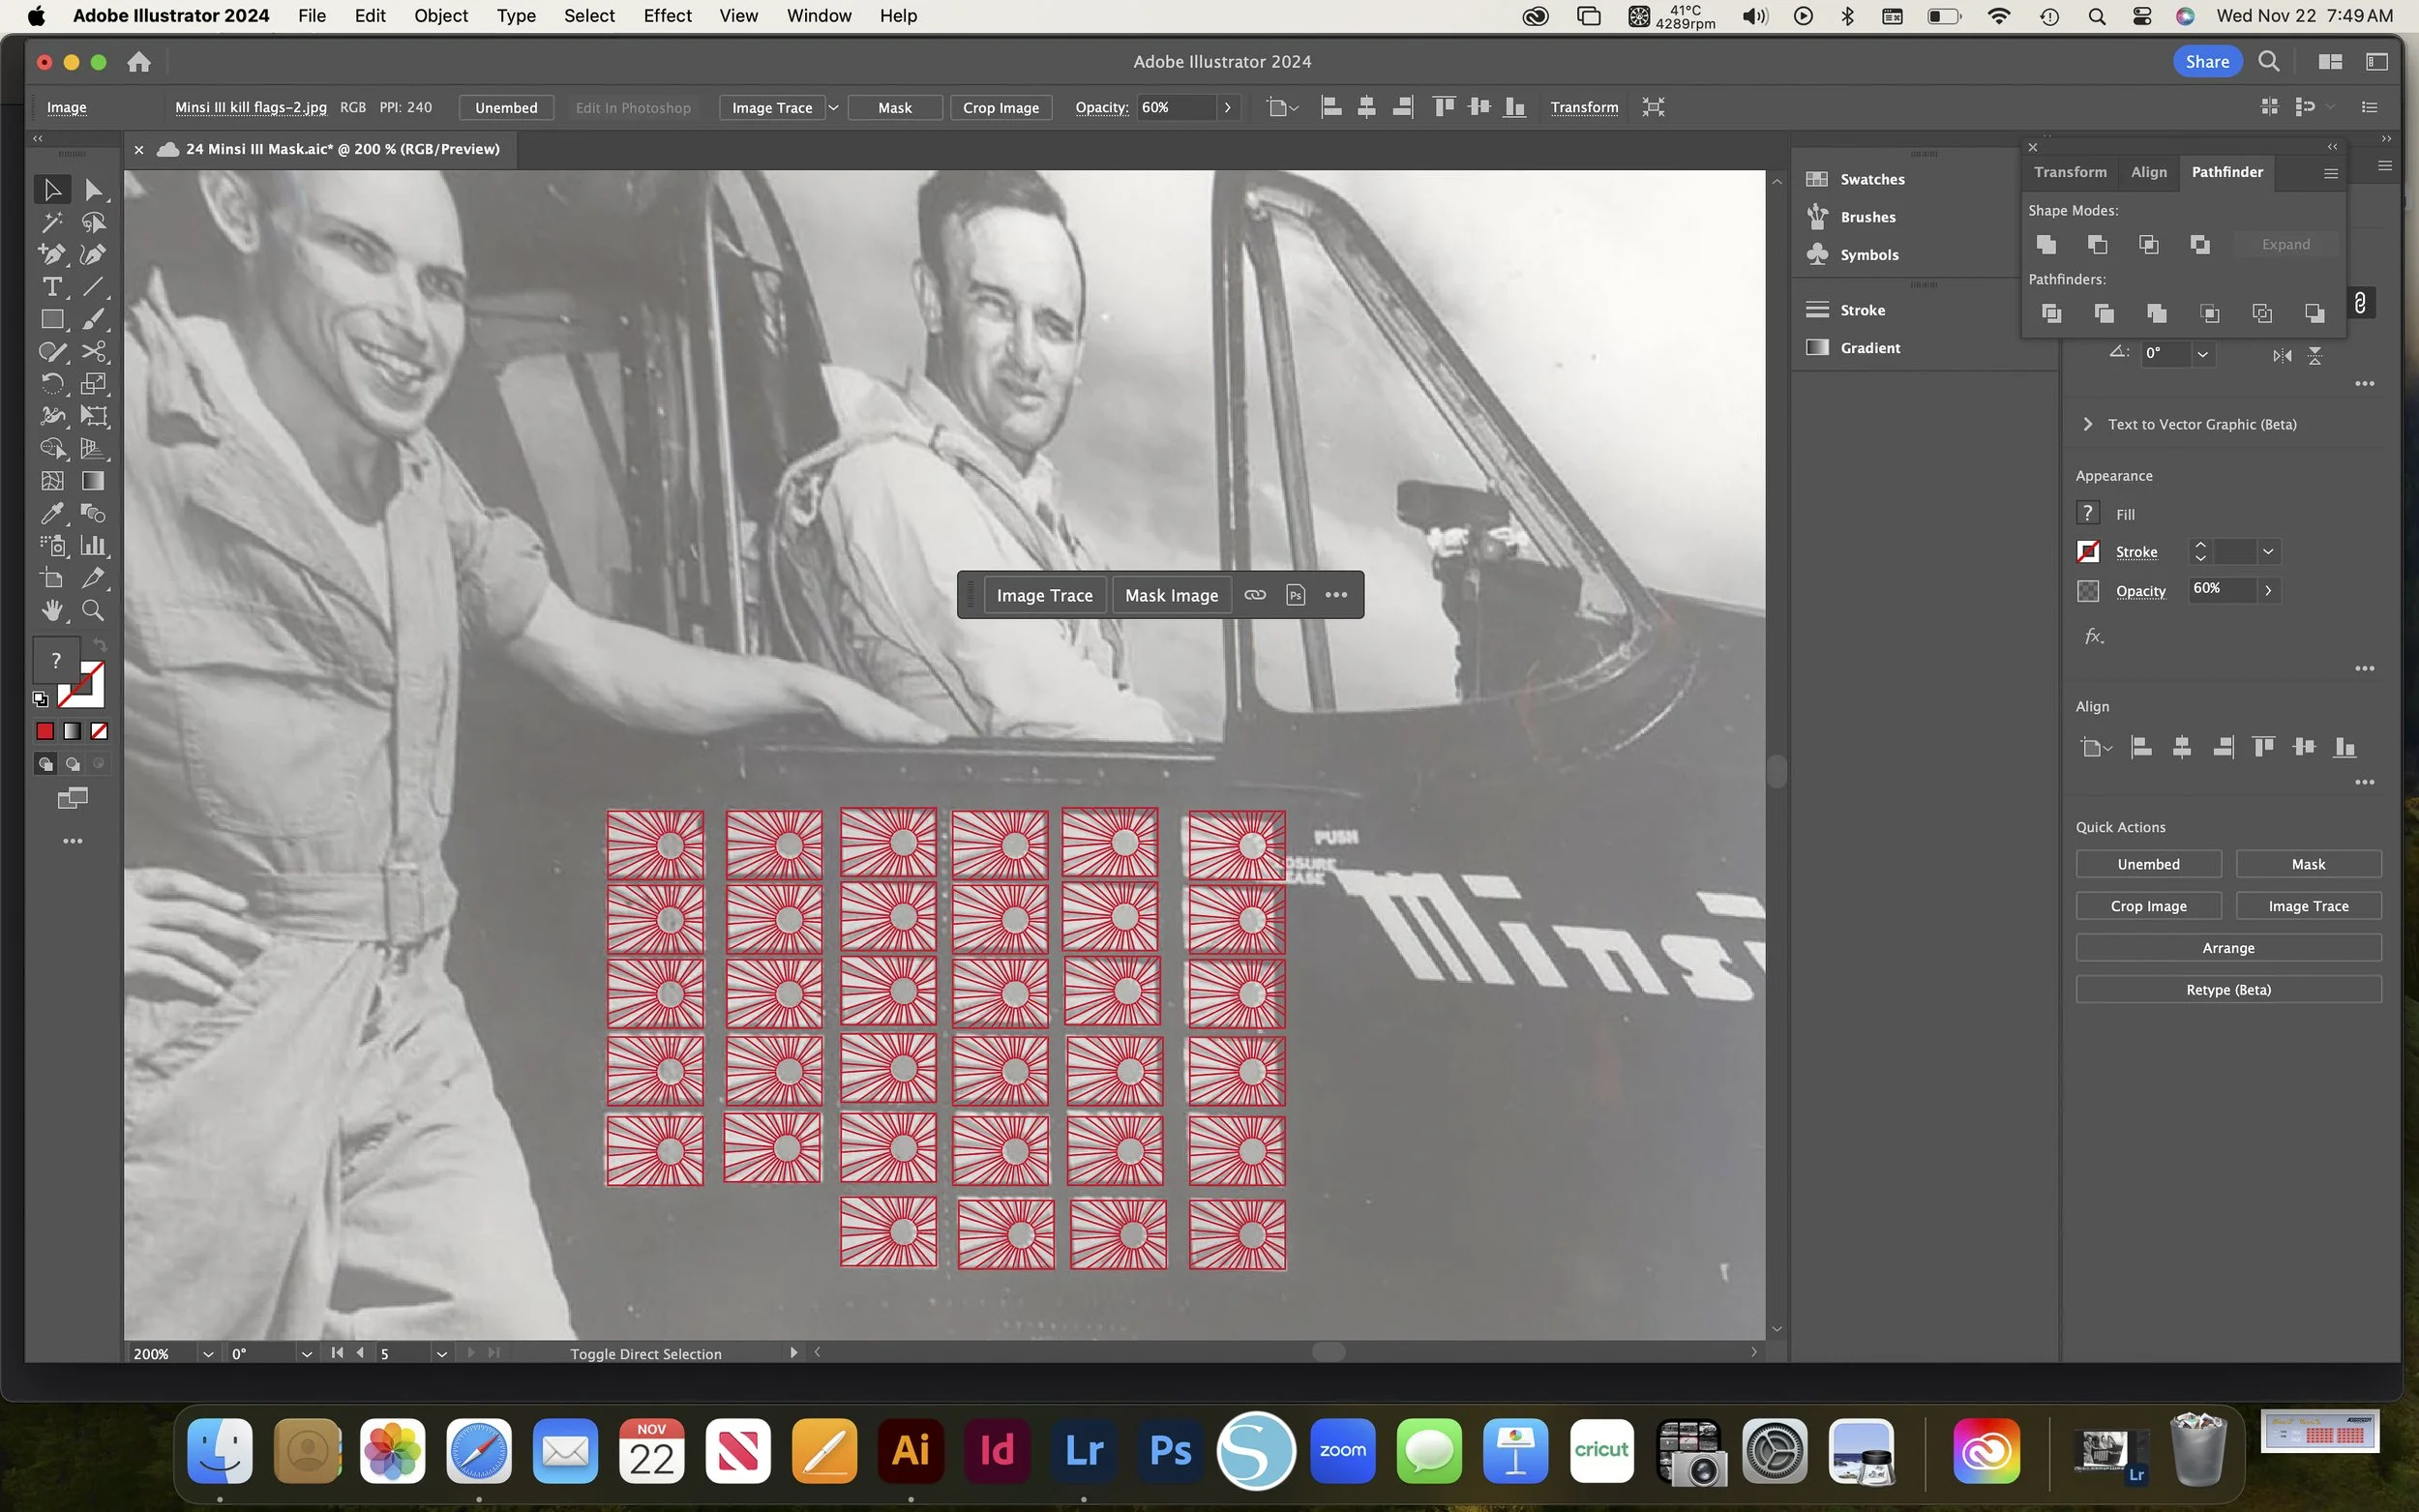
But Minsi’s name is further along the contour of the forward fuselage, so it is still bent and distorted in our first correction. We’ll make a second one. This time, we’ll assume the bottom of the letters sit on a straight line. We’ll also add a little more horizontal correction. It’s like reorienting your viewing position on the horizontal axis; imagine walking a little forward and inward to see the painted name from straight on. That’s what we can approximate in Lightroom.

With our main resources corrected for angle and distortion, we import them onto our artboard in Adobe Illustrator, where we use the drawing tools— Line Segment, Pen, Curve, Rectangle, Ellipse, etc.— to trace right over the reference images.


With those complete we use drawings and scans of kit parts to create the alignment edges of the masks. Then we arrange the artworks inside.

To test and adjust the fit of our designs we first print them onto ordinary copy paper, cut them out, and paste them to the actual kit parts. From there, back into Illustrator for corrections, another print on copy paper, and another test fitting. We repeat the process several times until we are certain the masks fit the kits precisely and arrange the markings perfectly.

Only then do we test them in our Silhouette and Cricut, cutting Oramask 813. 813 is a little too tacky for most painting applications but it is a great and test mask on bare plastic. By “great” we mean cheap and sticky. We use it to make sure our machines cut the designs reliably, and we photograph the tests to illustrate our placement guides.
We do this for every item included in each of our HAD products. Because we want you to be confident that—while inexpensive— our designs provide as authentic a scheme as the best products available. You’ll be quite satisfied with the hue, saturation, and luminance of the colors, too. Because you get to select them yourself.